Most astronomers know about Stellarium; it is a fantastic tool for exploring
what the night skies will be like. It is also a really good planning tool for
astrophotography.
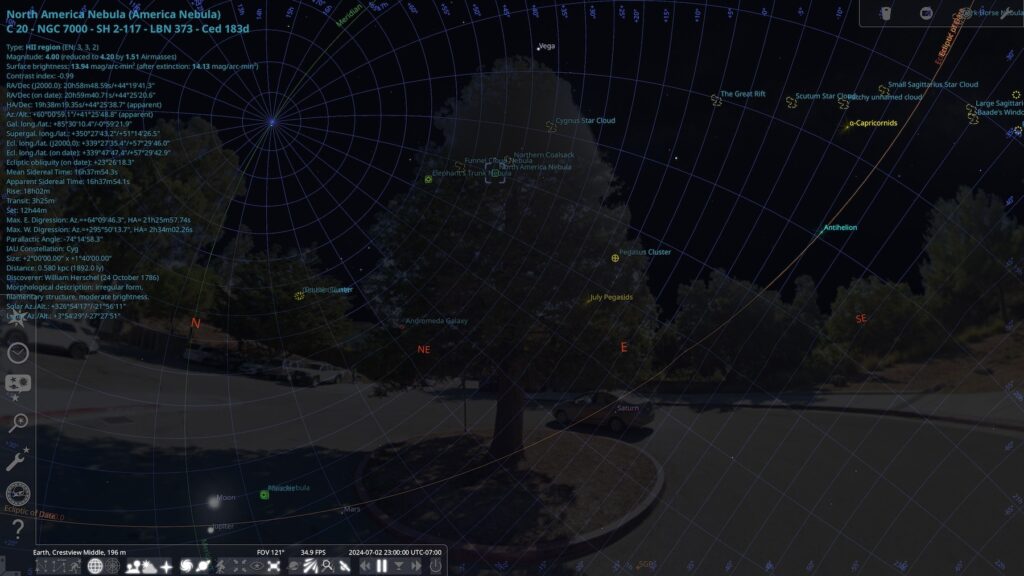
During one of the star parties at Crestview Park last summer, I wanted to take
some photos of the North America Nebula. After at least an hour of setting up,
focusing, and polar aligning my telescope, I slewed to where the North America
Nebula would be … only to notice it was perfectly hidden behind the giant
tree in the middle of the roundabout. I had checked it in stellarium before
leaving home, but had forgotten about the tree. After all the time setting up,
I did not want to re-align just to move the whole setup 5 meters to the side.

Here is a custom landscape in Stellarium to show three different locations in
Crestview Park, hopefully this helps other people when planning for our star
parties. The easy way to install it is to open Stellarium, open the “Sky and
viewing options window” on the left. Click on the “Landscape” tab at the top,
then click the “Add/Remove Landscapes …” button, and select the path to the
zip file. Stellarium will handle unzipping and putting the files in the correct
location. To manually install on linux, unzip so the structure is~/.stellarium/landscapes/crestview-left_tables/landscape.ini
In this zip file, the landscapes were saved from Google Street View and then
edited to what is needed for Stellarium. The first is near the picnic tables on
the left, another is in the middle of parking on the right, and last is right
in the middle.
Stellarium Landscape from Scratch
Taking a good panorama
To make a Stellarium landscape of somewhere else, the first part is getting a
good panorama. For Crestview Park, I used this Chrome extension
to fetch a spherical panorama from Street View. For making a landscape for my
backyard, I used the Photo-sphere mode on my Pixel phone. Stellarium needs to
have a full spherical panorama (ie, covering zenith and nadir, not only 360
degrees around azimuth).
The panorama needs to be in PNG format with a transparent sky. The size must be
2:1, and for best compatibility with most graphics cards, I’d suggest
powers-of-2, 4096×2048 works well for me. The horizon line must be half-way
down the image and completely horizontal. This was automatically correct when I
used the photo-sphere mode on my phone. For the best quality panoramas, you
should rotate the camera around the camera lens, don’t keep your feet in place
and swing your hands in front of you. When I took the photo sphere of my back
yard, I held the phone at the exact height/location where I set up my camera
tripod.
Aligning north in the panorama is more complicated. Find a mark that is
pointing exactly in one of the cardinal directions, it will be needed later to
align things.
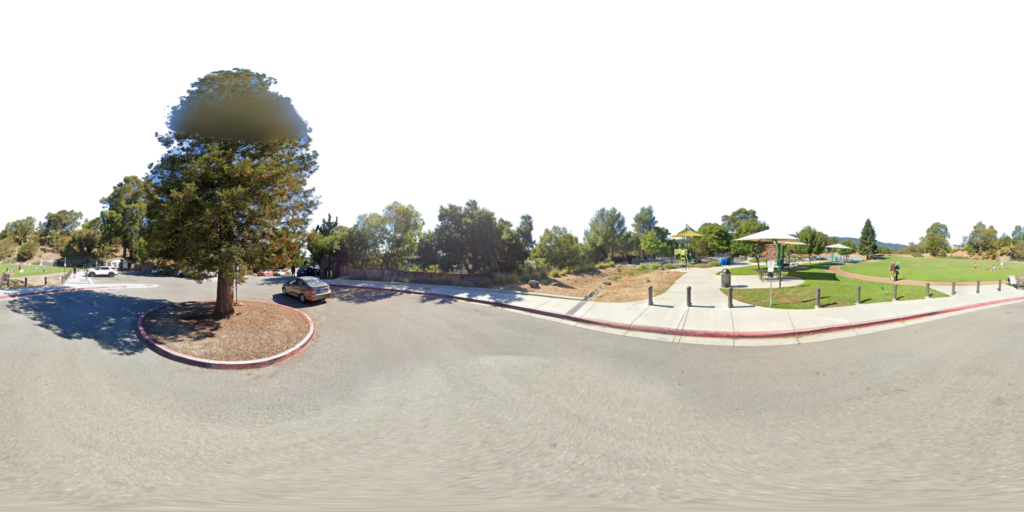
After all this, your panorama should look something like this when you open it
in a standard image viewer.

Removing the Sky
To make the panorama work in Stellarium, the sky needs to be transparent. Open
the image in GIMP or Photoshop and make sure to add an alpha channel to the
image if it does not already have one.
The best way to remove the sky from the image is with the fuzzy-select tool.
Play with the threshold value to find a good value that works for your image.
Once most of the sky is selected, hit the delete key to make the sky
transparent. I found that using “Select by: Blue Channel” worked well for my image,
too.
Once the sky is transparent, export the image in PNG format (jpeg does not
support transparancy). Put the image in a new empty directory.
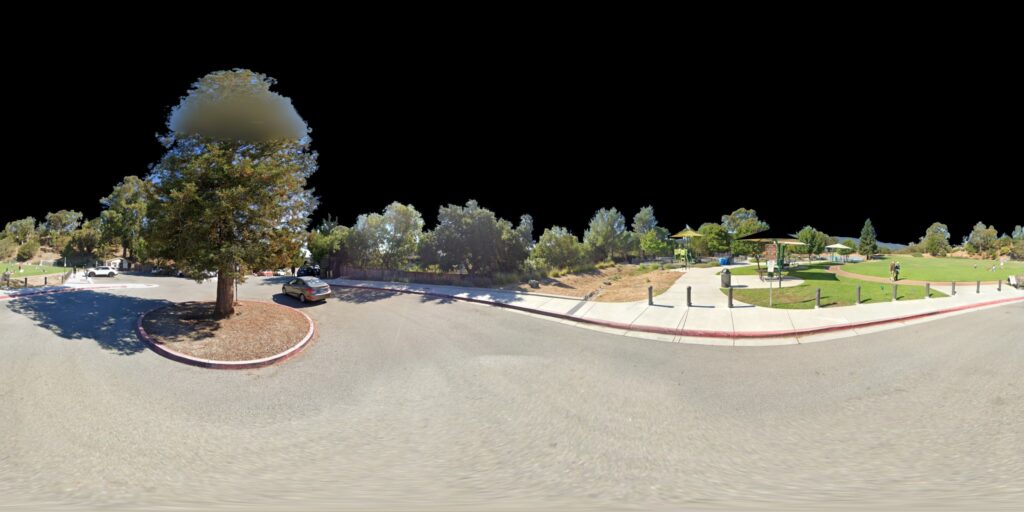
After editing, you should end up with a file that looks something like this:

Landscape Config File
Alongside the image, Stellarium needs a landscape.ini file in the directory next to the image. Here are the contents for the crestview landscape. Save this to landscape.ini in the same directory with the image.
[landscape]
name = Crestview Left Tables
author = Jason Zaman
description = Crestview Park SMCAS star party location. From google street view near tables on the left
type = spherical
maptex = crestview-left_tables.png
angle_rotatez = 203
; Do maths for the angle_rotatez value:
; angle_rotatez = 270 + degrees - (360 * pixels / image_width)
; degrees = the value of which ever cardinal point you choose in Photoshop; N=0, E=90, S=180, W=270
; pixels = is what you read off the top ruler in Photoshop at the cardinal point
; north ~= 380 pixels
; >>> 270 + 0 - (360 * 380 / 2048)
; 203.203125

[location]
light_pollution = 5
planet = Earth
latitude = +37d29'2.5872"
longitude = -122d17'5.6652"
altitude = 196
timezone = America/Los_Angeles
Lines starting with a semicolon are comments and are ignored.
The maptex = line should be the filename of the image exported earlier. Fill in name/description as you like.
The angle_rotatez = line is how we adjust the alignment between the image and the north.
Find a mark in the image that is lined up with a cardinal direction. Read off the horizontal coordinate in the image of that mark and it will be pixels in the formula. Then degrees depends on which cardinal direction:
North=0, East=90, South=180, West=270.
Compute angle_rotatez = 270 + degrees + (360 * pixels / image_width) and round to the nearest integer. For example, in the crestview image, north is 380 pixels from the left of the image, so angle_rotatez = 270 + 0 - (360 * 380 / 2048) = 203
Most of lines in the [location] section are optional, but are nice to have. If latitude/longitude are in the file, then Stellarium can automatically adjust the viewing location when switching landscapes.
the light_pollution= line is in the bortle scale. Altitude is in meters above sea-level.
Once both the image and the config file are done, zip both files up and add them in the Stellarium landscape UI.
